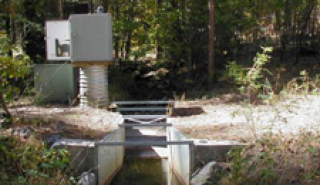
Putting a flume in really isn't that hard. You can really break down it down into five steps:
- Orienting the flume
- Siting the flume
- Securing the flume
- Cribbing the flume
- Backfilling
Orienting The Flume
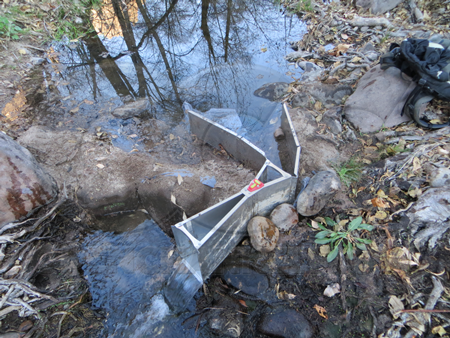
Now is the time to take the time to get familiar with the flume. Make sure that you understand how the needs to sit in the channel. The important thing here is to know which end goes upstream – simple, right!

- Cutthroat
- The short section of the hourglass shape goes upstream, while the larger and longer section goes downstream
- H-Flumes
- The narrow, pinched section goes downstream, while the large open end goes upstream
- Montana
- Similar to the H-flume, the narrow opening goes downstream, while the larger open end goes upstream
- Palmer-Bowlus
- The raised trapezoidal ramp section goes downstream, while the constant u-channel goes upstream
- Parshall
- The flat floor goes upstream, while the drop in the floor goes downstream
- RBC
- Like the Palmer-Bowlus flume, the raised ramp section goes downstream
- Trapezoidal
- Be careful here – the inlet and outlet of the flume look similar – the shorter end goes downstream
Siting the Flume
If you want a flume to work, set it so that it captures all of the flow. That flow should come right down the centerline of the flume – not off to one side or another.
While your siting the flume, you’ve got to put it level. Front-to-back and side-to-side. Not at an angle, not canted one way or the other. Take the time to level, level, and level again.

Securing the Flume
Whether the flume is going to be set in concrete or an earthen channel, it is going to have to be secured. If it shifts out of place during or after installation your readings just aren’t going to be right. You know that, I know that. So let’s make sure you’ve got the flume secure.

On most flumes there are anchor clips chemically bonded to the outside. These clips are there for your use – use wire with them to tie them back to rebar, run threaded rod through them.
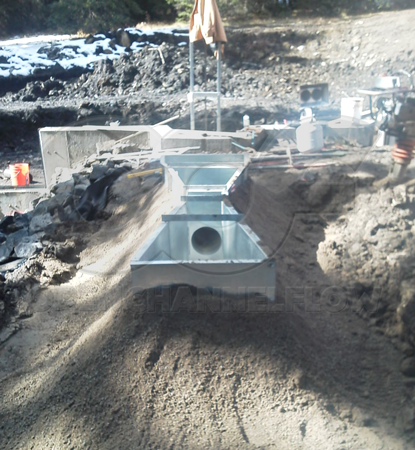
Cribbing the Flume
Great, now you know which way the flume goes, you’ve got it set so that it isn’t going to shift. What next? Why cribbing the flume of course!
In cribbing the flume you are reinforcing the interior so that it doesn’t distort as you backfill around it - completing the installation. Most flumes, either because of shape or material, can distort during installation or use. Unless the flume is keep dimensionally stable during the installation process, what was a device that was accurate to +/-3-5% could easily be one that is only half as accurate.

Some look at cribbing as a waste of time. Maybe they got away without cribbing a flume before. Maybe they are rushed to get the installation done. It doesn’t matter, if you don’t do it, you are bound to run into a problem sooner or later. Any time or money that you have saved in the past is going to be eaten up (and then some) by one bad installation. Take your time and do it right.
Backfilling
All right, you are in the home stretch. You now which end is the front and which end is the back, you’ve set the flume in the channel, you’ve leveled it, and heck you’ve even secured it with the anchor clips. Now that you’ve gotten that far, and have cribbed the flume naturally, you are ready to get it set in place.
As you begin to backfill around the flume, remember to do it evenly and in layers. Those layers should be about 12-inches [30.48 cm] high. Any higher that and you run the risk of deforming the flume. Partly due to unequal stress around the flume and partly because if you cheat a little here, you’ll be tempted to cheat a little more and the next thing you know, you’ll figure ‘oh, what the heck, I’ll just do it all at once.”