
Regardless as to which flume you are installing, there are general guidelines that apply to any installation.
It is important to keep the following points in mind:
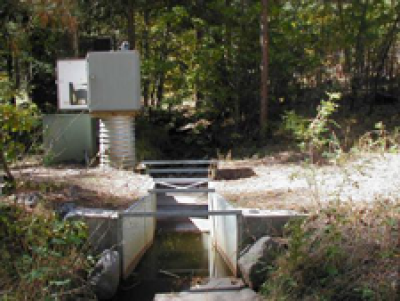
- The approach flow should be sub-critical, tranquil, and uniformly distributed across the channel. For select applications, Openchannelflow offers flow conditioning / controlling structures that can be installed upstream of the flume (or in an inlet end adapter / approach section).
- There should be no bends, dips, elbows, or flow junctions immediately upstream of the flume’s location.
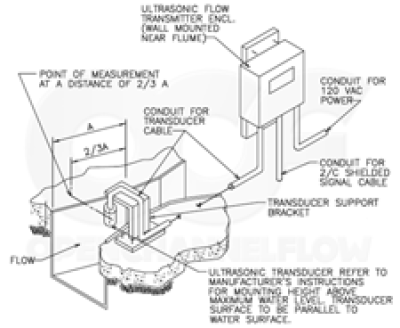
- The flume should be centered in the channel.
- The flume must be secured so that it doesn't float or shift out of place during installation.
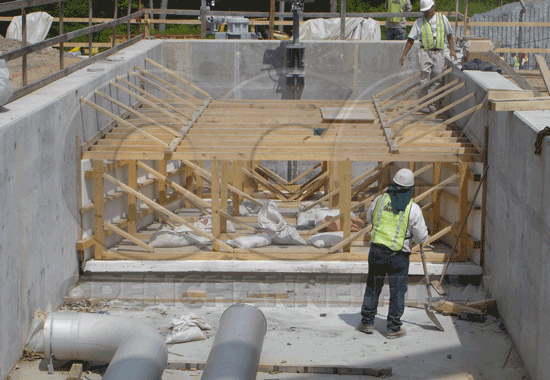
- Flume sidewalls and floors must be braced (cribbed) internally (plywood and lumber are typically used) so that the flume does not distort during installation. The internal dimensions of a flume are critical to its successful operation. Failure to maintain a flume’s dimensions during installation is generally not a correctable (or warrantable) condition. For large flume bracing (cribbing) is particularly important – a flume’s inlet floor and sidewalls are particularly susceptible to distortion due to insufficient bracing (or concrete / fill lifts of more than 6-inches [15.24 cm] at a time). Take your time and do this right.
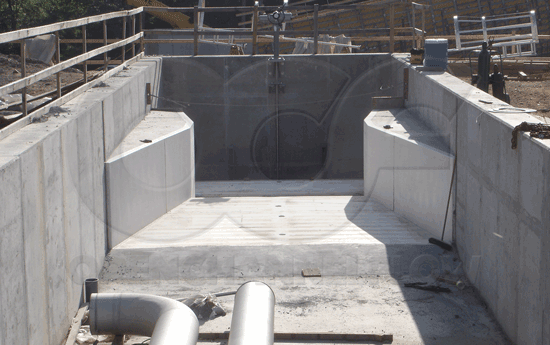
- The floor of the flume should be set so that discharge out of the flume is not restricted (the flume becomes submerged). When channel or flow conditions dictate that the flume be set above the floor of the channel, a 1:4 (rise:run) slope should be formed to transition flow into the flume. Abrupt inlet transitions should be avoided.
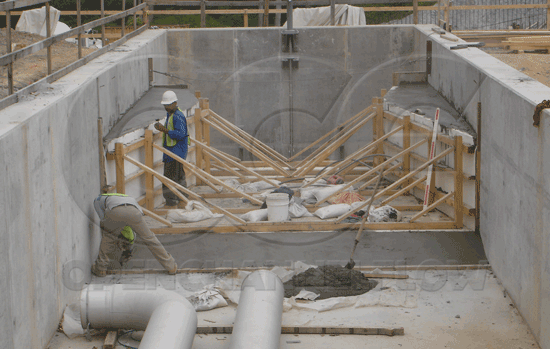
- When using grout or earth to secure a flume, lifts of no more than 6-inches [15.24 cm] are recommended. Do not rush this step and attempt lifts greater than this. More than one contractor has had to replace a flume because they tried to encase the flume with just one pour. Just like bracing / cribbing – take your time and do this right.
- The dimensional bracing at the top of a flume is just that – to keep the flume’s dimensions correct. The bracing should be left on the flume until after the installation is complete. If the flume is set in concrete or an earthen channel and is adequately secured, the bracing can be removed. If the flume is free-standing or otherwise not secured, leave the bracing it place. If a cover is provided over the flume, the cover may take the place of the bracing. Always verify a flume’s dimension after the bracing has been removed – even in embedded installations.
With these steps in mind, you are on your way to a trouble-free flume installation!
Related Blog Posts
-
Expert Insights
-
Expert Insights
-
Expert Insights


Explore more insights in our blog.

LOCATIONS IN ATLANTA, GA & BOISE, ID