The key to an accurate weir installation is the correctly sizing the upstream weir pool.
To guarantee a successful weir installation, just keep these 9 easy steps in mind!
- The approach channel should be straight and of uniform cross-section for a distance of 15 to 20 times the maximum anticipated water depth (head) (Hmax) upstream of the weir.
- The approaching flow should be sub-critical, tranquil, and be uniformly distributed across the width of the channel. The flow should not be turbulent, surging, unbalanced, or possessing a poorly distributed velocity pattern.
- Center the weir in the flow stream.
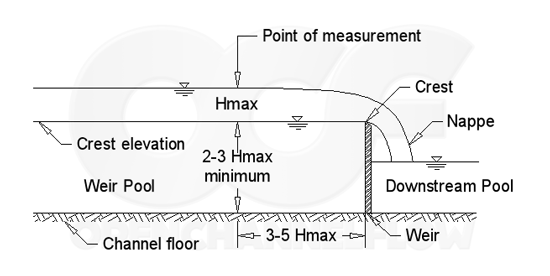
- Set the lowest point of the crest (the edge of the weir over which flow passes) at least two to three (2-3) times (Hmax) above the channel floor
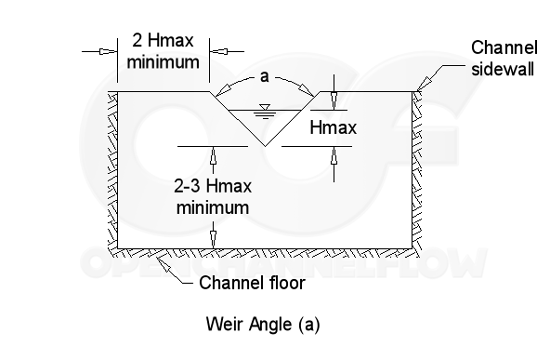
- At full flow, the sidewalls on each side of the weir should extend two (2) times Hmax on either side of the maximum width of the flow over the crest to the channel sidewalls.
-
The lowest point of the crest should be at least 2 inches (5 cm) above the downstream water level.
- Weirs MUST be level from front-to-back and from side-to-side. No deviation is allowed.
-
The point of measurement (Ha) is three to four (3-4) times Hmax upstream of the weir. Any closer and the head reading is affected by drawdown as the flow approaches the weir.
- The zero elevation for Ha is the same elevation as the lowest point of the weir crest – this is the same as the water surface being the weir once flow over the weir has ceased.