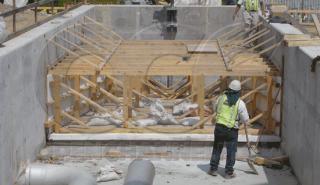
Cribbing (bracing) a flume is one of life's little chores. It isn't something we want to do, but rather something we have to do. If it is done well, the results are great. If it is done poorly (or not at all), trouble is bound to follow.
In installing the Parshall flume below, the contractor decided to take a couple of shortcuts in the installation process.
The sidewalls (and mostly likely the floor also) were not sufficiently reinforced. This is evident by the deflection inward at the entrance of the flume and by the bow of the staff gauge at the point of measurement. A typical flume sidewall has a laminate thicknesses are 1/4-inch [0.635 cm] (1 3/8-inch [3.493 cm] at the stiffening ribs). While this construction is incredibly strong, it is important to remember that although fiberglass may be cured, there is still some level of plasticity in the laminate. By failing to adequately crib (brace) the flume internally during installation, the likelihood of sidewall deformation during installation increases dramatically. This likelihood is further increased if backfill is not place in the even lifts as recommended in the installation instructions. Installing backfill in lifts helps to reduce the stresses of installation.
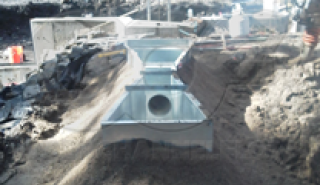
Proper cribbing of a flume looks like this.
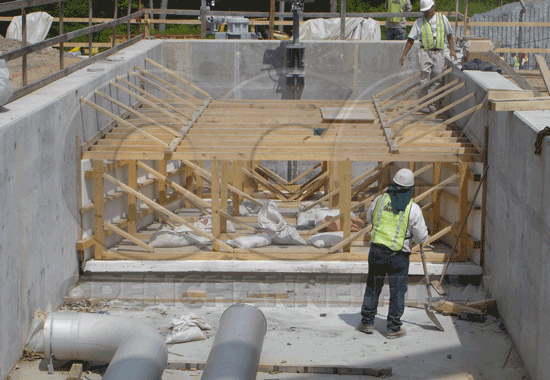
Here you can see that not only the wall of the flume have been braced, but floor has also been braced and weighed down with sandbags. Floor distortion is more common than sidewall distortion as the floor of a flume typically spans a much greater area than the sidewalls of a flume do.
Additionally, the dimensional angles at the top of the flume were removed at some point during the installation (and later put back on when a problem developed). Flumes ship with dimensional angles to help keep the top of the flume at the nominal dimensions for the flume to operate properly. Removing them too early in the installation process allows the top of the flume to flex (usually inward) out of position.
Dimensional angles should be left in place during the course of an installation. When embedding a flume in concrete, the angles should only be removed after the installation has been completed and the dimensions of the flume have been verified. In earthen channel applications, it is advisable to leave the angles on even after the instalaiton is completed. Earthen channel installations are subject backfill consolidation, frost heave, and a variety of other conditions that concrete installations are not subject to.
Remember that properly installing a flume doesn't take a lot of time, just a little forethough and patience.